I thought I would make a quick "How-to" on setting wheel alignment since I was flipping my tie rod ends and I was going to have to re-align the wheels anyways.
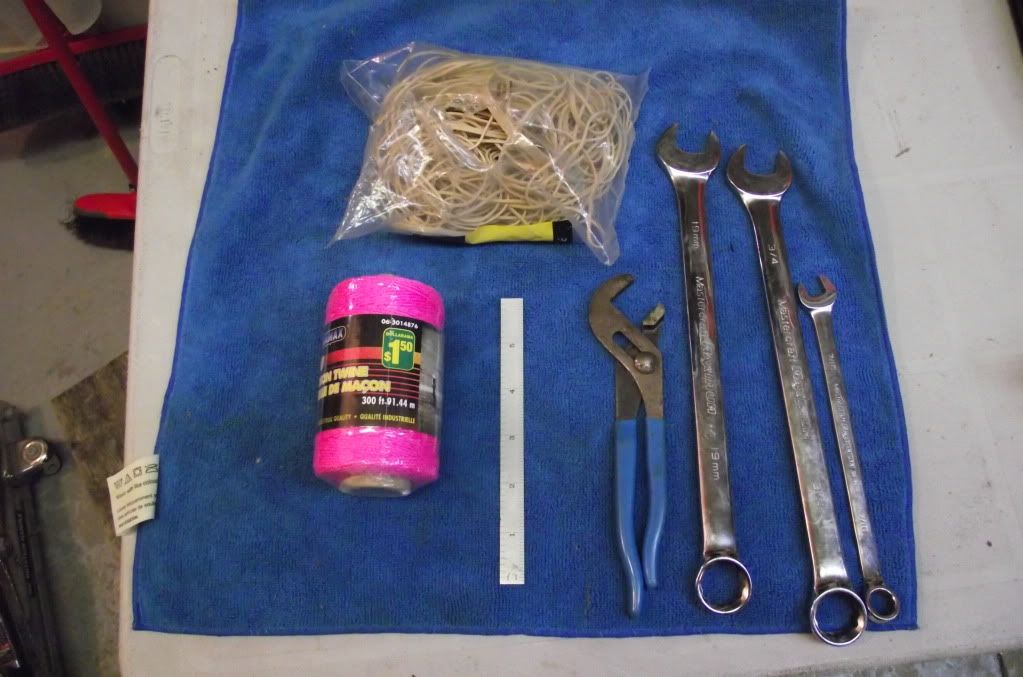
Here's some of the tools you will need...
![Image]()
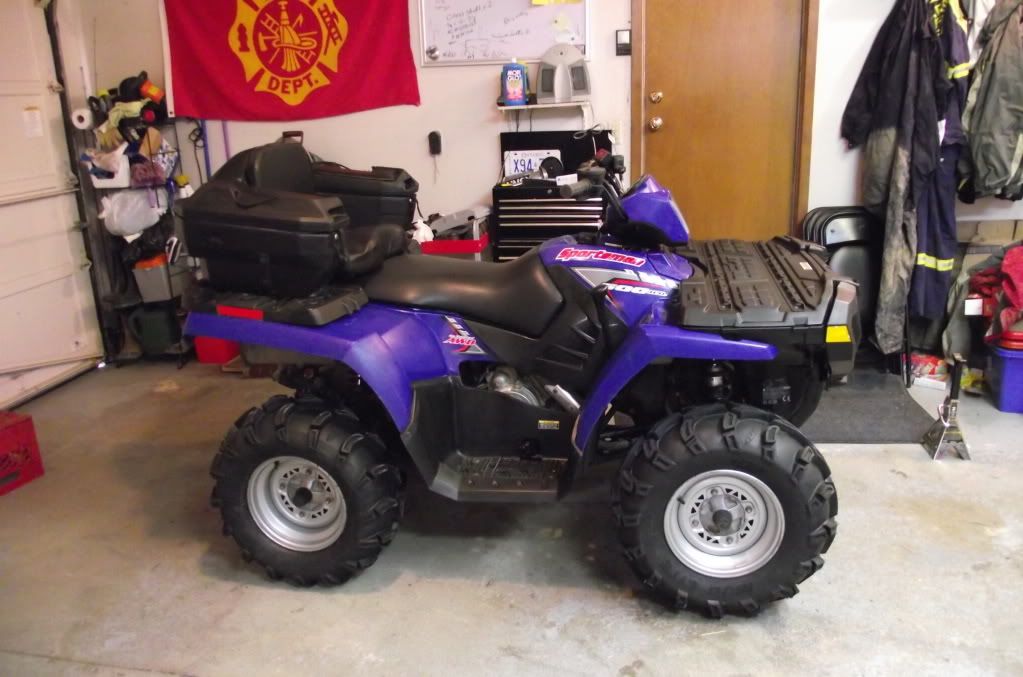
1.) Start with the ATV on a smooth and level surface, like a cement garage floor or driveway.
![Image]()
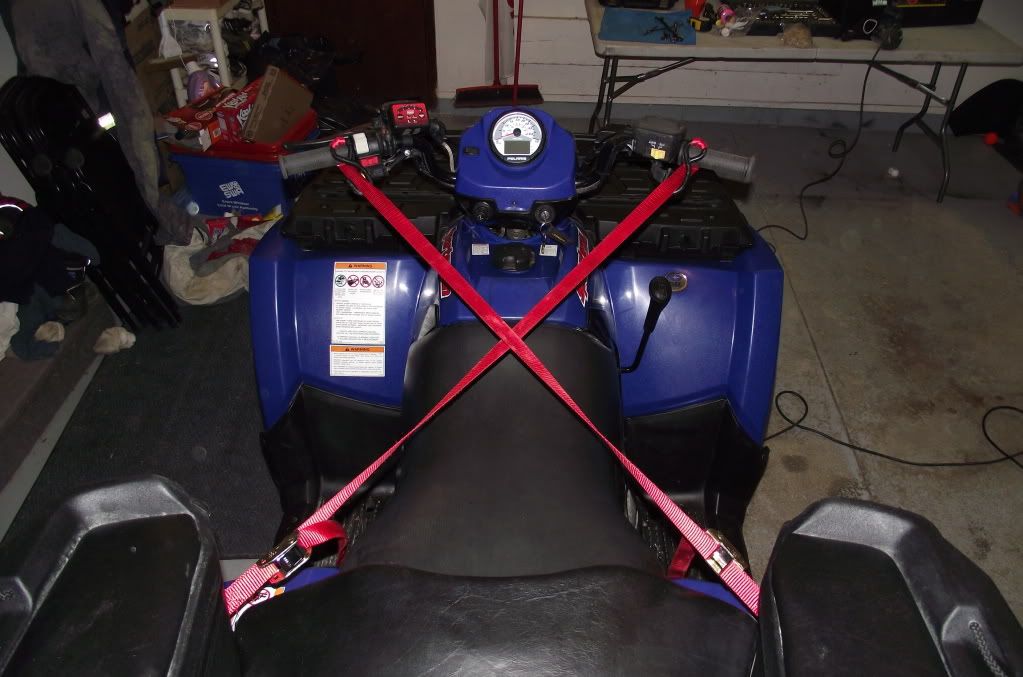
2.)Center up (Eyeball It) the handle bars and lock them into place with 2 ratchet straps, one on each side of handle bars. This of course prevents them from moving when your adjusting the tie-rods.
![Image]()
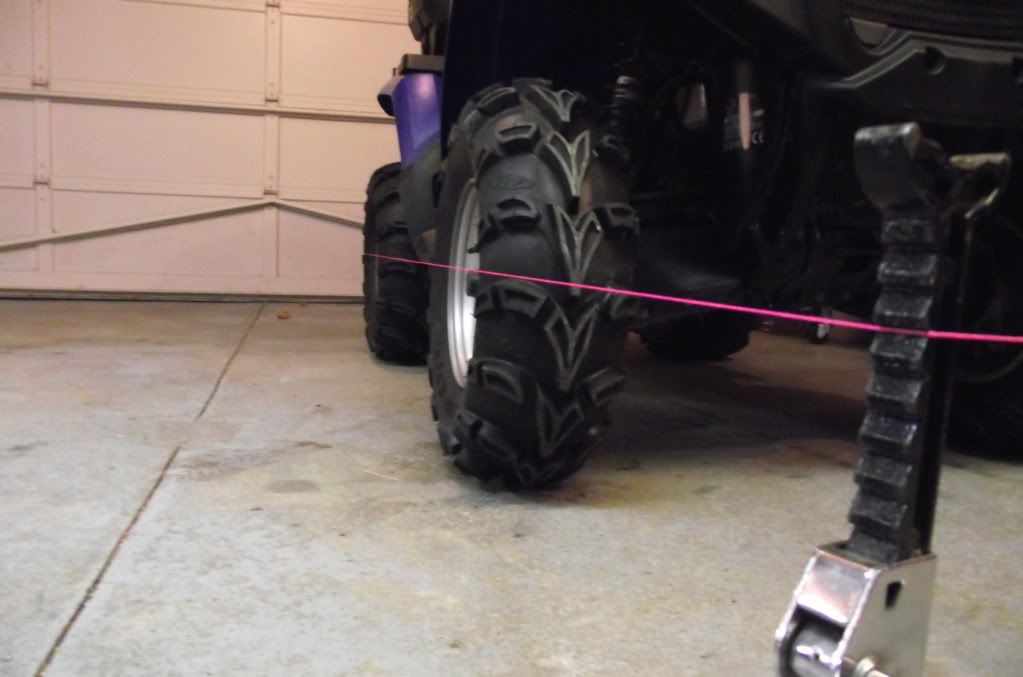
3.) Place two Jack Stands approximately 2 feet in front of the atv even with the outside edge of the two front wheels.
![Image]()
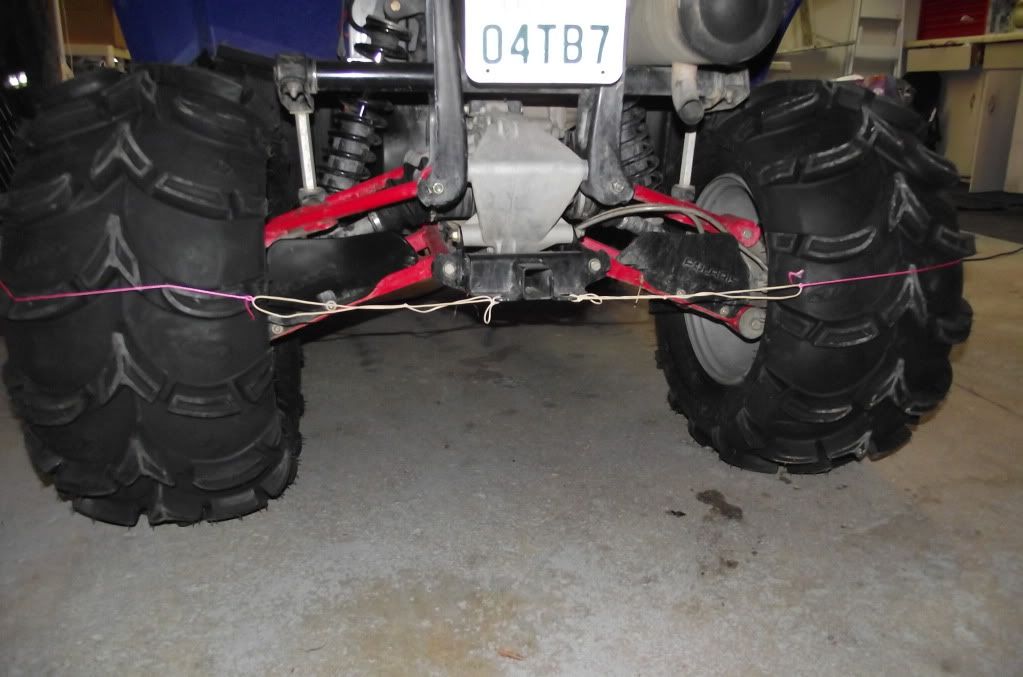
4.) Wrap a length of string all the way around the ATV and Jack Stands, Start and end at the rear hitch. Make sure the string is the same height from the ground on all 4 wheels. I like to attach a few elastic bands to both ends of the string before attaching the string to the hitch. This makes it easier to adjust the strings when moving the Jack Stands.
![Image]()
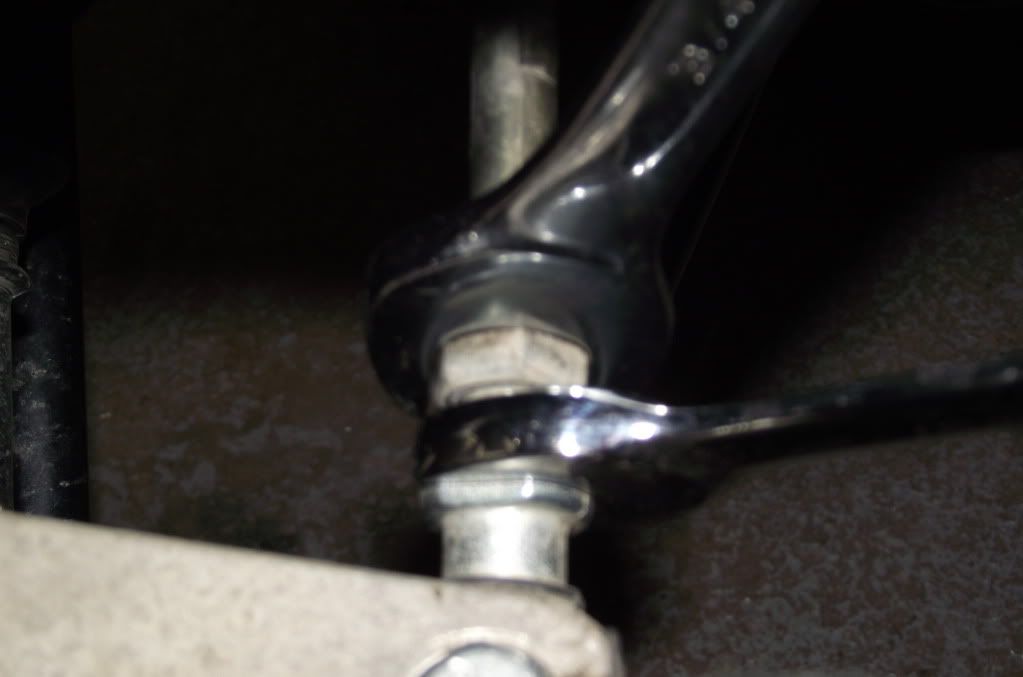
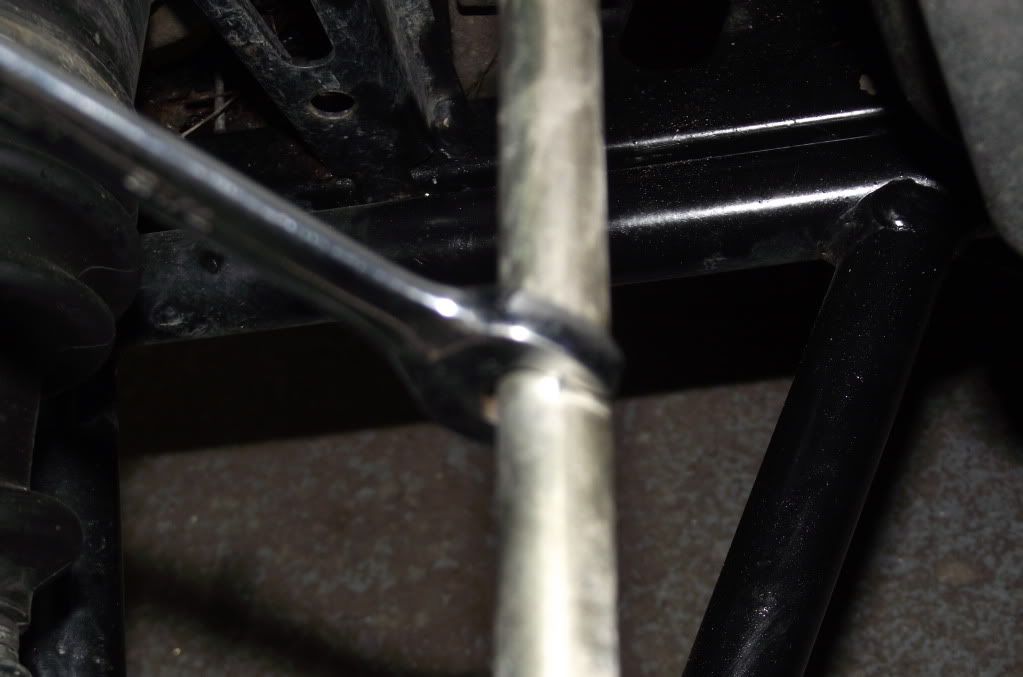
5.) Break lose the inner and outer tie-rod nuts. NOTE! Make sure you use 2 wrenches, one on the nut and one on the ball joint. Damage can occur by only using one wrench.
![Image]()
6.) Adjust the string by moving the Jack Stands in or out untill the string just touches both of the side surfaces of the rear tires on each side of the ATV. This will take some time to get it right but it needs to be done! The strings should be as close to the centerline of the rims as possible.
![Image]()
Check manufacturers wheel alignment specifications on your specific make and model before you adjust any components.
For this wheel alignment I'm using the Polaris Specs which seems to be a common setting.
Polaris - The recommended toe alignment is 1/8″ to 1/4″ toe out. This is a total amount, not per wheel.
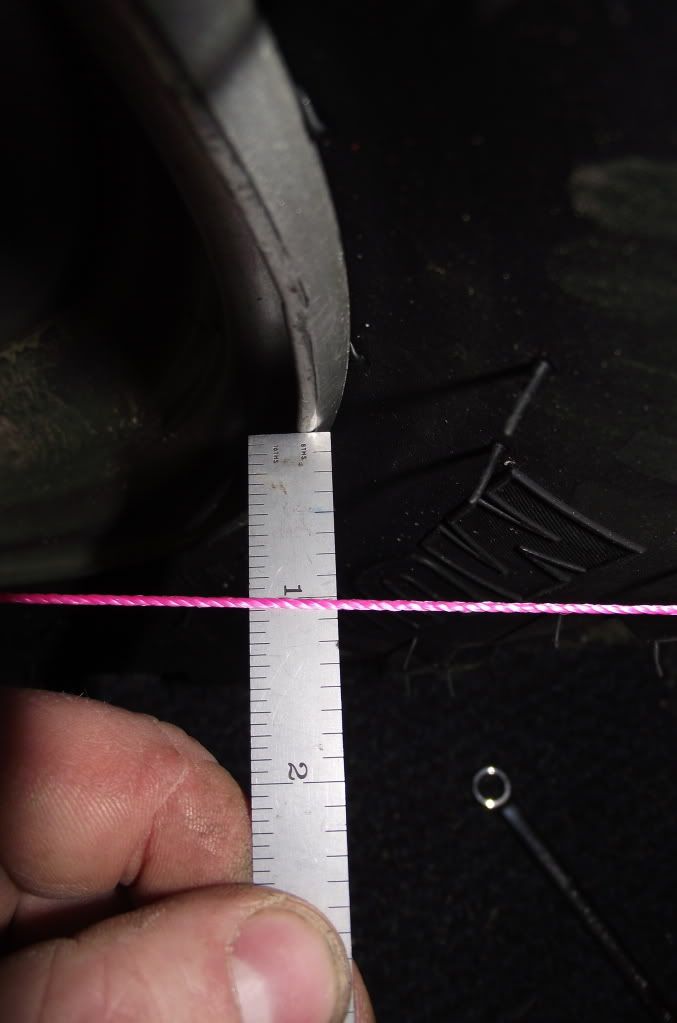
7.) On the front rim, measure the distance from the string to the rim at the front and rear edges of the rim. The rear measurement should be 1/16″ - 1/8″ (.2 to .3 cm) more than the front measurement.
![Image]()
![Image]()
8.) If an adjustment is necessary, Turn the tie rod itself with a wrench or your hand in small increments. It doesn't take much to move the tire a long way, so go slow. Keep re-checking your measurement's until you have a 1/16″ - 1/8″ differance to the string.
![Image]()
9.) Once your satisfied that you have the correct "Toe Out" measurements you can tighten up the inner and outter tie-rod nuts on both sides. AGAIN...make sure to use 2 wrenches.
10.) Now take your ATV for a test drive to test your adjustments. If it still pulls one way or the other, just repeat the above steps to tweek the adjustments again utill your happy.
The whole process only takes about 15-20 min.
Here's some of the tools you will need...
1.) Start with the ATV on a smooth and level surface, like a cement garage floor or driveway.
2.)Center up (Eyeball It) the handle bars and lock them into place with 2 ratchet straps, one on each side of handle bars. This of course prevents them from moving when your adjusting the tie-rods.
3.) Place two Jack Stands approximately 2 feet in front of the atv even with the outside edge of the two front wheels.
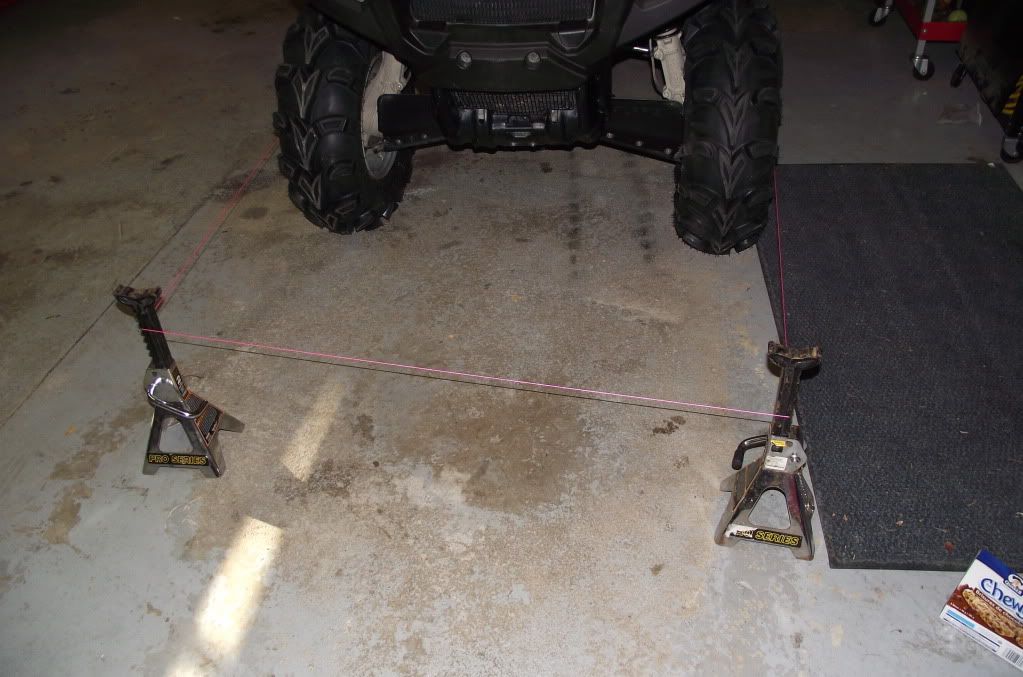
4.) Wrap a length of string all the way around the ATV and Jack Stands, Start and end at the rear hitch. Make sure the string is the same height from the ground on all 4 wheels. I like to attach a few elastic bands to both ends of the string before attaching the string to the hitch. This makes it easier to adjust the strings when moving the Jack Stands.
5.) Break lose the inner and outer tie-rod nuts. NOTE! Make sure you use 2 wrenches, one on the nut and one on the ball joint. Damage can occur by only using one wrench.
6.) Adjust the string by moving the Jack Stands in or out untill the string just touches both of the side surfaces of the rear tires on each side of the ATV. This will take some time to get it right but it needs to be done! The strings should be as close to the centerline of the rims as possible.
Check manufacturers wheel alignment specifications on your specific make and model before you adjust any components.
For this wheel alignment I'm using the Polaris Specs which seems to be a common setting.
Polaris - The recommended toe alignment is 1/8″ to 1/4″ toe out. This is a total amount, not per wheel.
7.) On the front rim, measure the distance from the string to the rim at the front and rear edges of the rim. The rear measurement should be 1/16″ - 1/8″ (.2 to .3 cm) more than the front measurement.
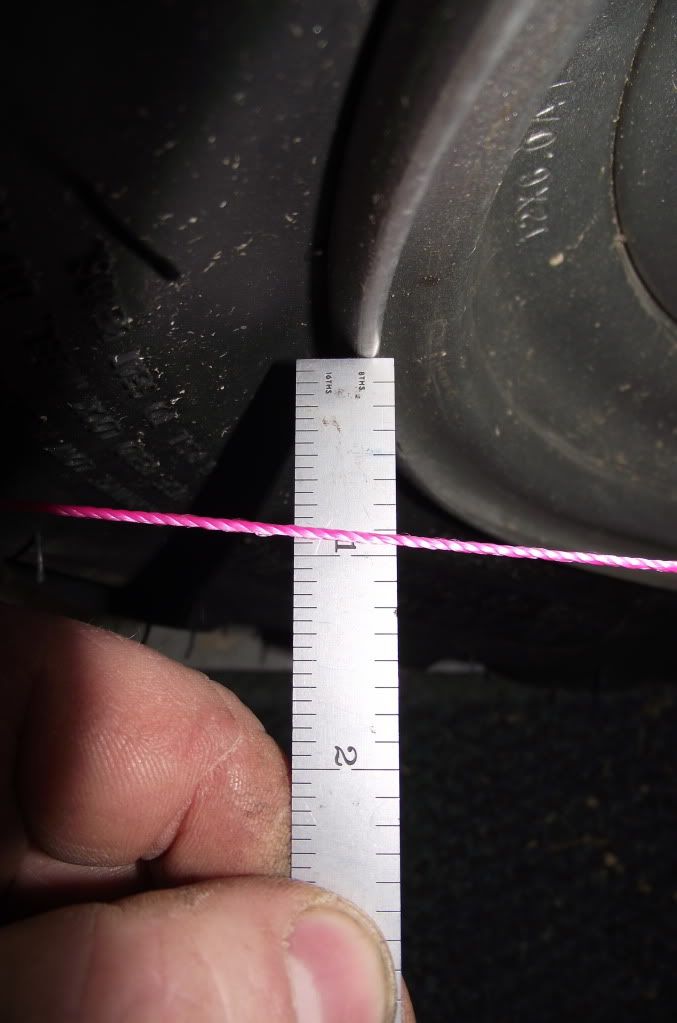
8.) If an adjustment is necessary, Turn the tie rod itself with a wrench or your hand in small increments. It doesn't take much to move the tire a long way, so go slow. Keep re-checking your measurement's until you have a 1/16″ - 1/8″ differance to the string.
9.) Once your satisfied that you have the correct "Toe Out" measurements you can tighten up the inner and outter tie-rod nuts on both sides. AGAIN...make sure to use 2 wrenches.
10.) Now take your ATV for a test drive to test your adjustments. If it still pulls one way or the other, just repeat the above steps to tweek the adjustments again utill your happy.
The whole process only takes about 15-20 min.
")